Home / News / CNC Bearing Replacement: A Step-by-Step Guide to Ensuring Optimal Performance
CNC Bearing Replacement: A Step-by-Step Guide to Ensuring Optimal Performance
Introduction
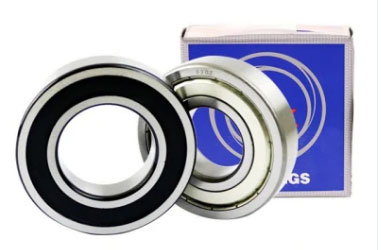
Bearings are critical components of CNC (Computer Numerical Control) machines, as they ensure smooth motion and precise positioning of the spindle and other moving parts. Over time, bearings may wear out or become damaged, negatively impacting the machine's performance and the quality of the produced parts. In such cases, replacing the bearings is essential to maintain optimal performance. This article will provide a step-by-step guide to CNC bearing replacement, ensuring a successful and efficient process.
Step 1: Diagnosis and Identification of the Issue
Before proceeding with the replacement, it is crucial to diagnose and confirm that the bearings are the cause of the problem. Look for signs of bearing wear or damage, such as unusual noises, excessive vibrations, or decreased precision. Once you have identified the issue, make sure to gather the necessary information about the specific bearings that need replacement, including their type, dimensions, and manufacturer.
Step 2: Gather Required Tools and Equipment
Replacing CNC bearings requires specific tools and equipment, such as:
Bearing puller or extractor
Arbor press or hydraulic press
Torque wrench
Soft mallet or plastic hammer
Clean lint-free cloths
Lubricant (as recommended by the manufacturer)
Ensure that you have all the necessary tools and equipment before starting the replacement process.
Step 3: Safely Power Down and Secure the Machine
Before starting the bearing replacement process, make sure to safely power down the CNC machine and disconnect it from the power source. Secure the machine and its components to prevent any movement during the replacement process.
Step 4: Remove the Affected Components
Carefully disassemble the CNC machine to access the bearings that need replacement. Follow the manufacturer's instructions and document the disassembly process to ensure proper reassembly later.
Step 5: Remove the Old Bearings
Using a bearing puller or extractor, carefully remove the old bearings from the machine without causing damage to the surrounding components. If necessary, use an arbor press or hydraulic press to assist in the removal process.
Step 6: Clean and Inspect the Components
Before installing the new bearings, clean the bearing seats and surrounding components using a lint-free cloth to remove any debris or contaminants. Inspect the components for any signs of wear or damage that may also need attention.
Step 7: Install the New Bearings
Carefully install the new bearings in the CNC machine, ensuring that they are properly aligned and seated. Use an arbor press or hydraulic press to assist in the installation process if necessary. Apply the recommended lubricant to the bearings following the manufacturer's guidelines.
Step 8: Reassemble the CNC Machine
Reassemble the CNC machine following the documented disassembly process and the manufacturer's instructions. Ensure that all components are properly aligned and securely fastened.
Step 9: Verify the Functionality and Performance
Power up the CNC machine and perform a test run to verify its functionality and performance. Check for any unusual noises or vibrations, and confirm that the machine operates with the expected precision and accuracy.
Conclusion
CNC bearing replacement is essential to maintain optimal performance and prolong the life of the machine. By following this step-by-step guide, operators can efficiently replace worn or damaged bearings, ensuring the production of high-quality parts and the overall reliability of their CNC machines.
- Previous: CNC Bearing Noise: Causes, Diagnosis, and Remediation
- Next: CNC Bearing Maintenance: Essential Practices for Prolonging Bearing Life and Ensuring Optimal Perfor
Products
- Thin-Section Bearings
- Cylindrical Roller Bearings
- Tapered Roller Bearings
- Slewing Bearings
- Ball Bearings
- Precision Angular Contact Ball Bearing
- Precision Angular Contact Bearing 70 Series
- Ultra High Speed Angular Contact Bearing With Seal H70 Series
- High Speed Angular Contact Ball Bearing Sealed H72 Series
- Screw Bearing With Sealing
- Super High Speed Angular Contact Bearing B70 Series
- Sealed Ultra-high Speed Angular Contact Bearing SH70 Series
- High Precision Angular Contact Ball Bearings 72 Series
- Ultra-High Speed Angular Contact Bearings With Sealing B719 Series
- Crossed Cylindrical Roller Bearings
- Crossed Tapered Roller Bearings
- Spindle Bearings
- Thrust Roller Bearings
- Thrust Ball Bearings
- Spherical Roller Bearings
- Spiral Roller Bearing
Our company can produce more than 3000 kinds of standard and nonstandard rolling bearings in 9 different categories. Our company products are commonly used in metallurgy, mining, machinery, petroleum industry, electricity etc.